My Pins

Monday, February 28, 2011

Escaping the Sun

It was a beautiful, sunny, typical summer day here yesterday.
After a morning at the market, we decided to very simply cook up some sausages, have them in bread with sauce.
Simple authentic and not over-thought.
To escape the sun, we rearranged the sheets over the clothes line to provide shelter and pulled up the picnic table. My daughter hung out the towels she had just washed and the reluctant, lazy breeze blowing through them created a cooling effect.
It reminded us all of making cubby houses and tents from blankets and chairs when we were little.
We were four at table
We sank deeper and deeper into relaxation, basking in simplicity.

The butterfly net made an appearance, and there was much good natured derision about my moth catching techniques.
We mixed up some washing up detergent and fashioned a loop with a piece of wire and tried to amuse the dogs with some bubble blowing.
But even they were feeling lazy.

My daughter found a block puzzle in the cubby house and she and Craig's son played with that for a bit, swapping stories of childhood memories.
Our makeshift tent and agenda-free afternoon took us back to a time of secrets and make believe games.
There was no fancy outdoor setting, no platters of speciality food, no trendy market umbrella....
We wanted for nothing this afternoon
We were experiencing pure joie de vivre in the most simplest of ways.
The world slowed it's frenetic pace as our tent sheets billowed and flapped.
Do you think sometimes we encumber ourselves with too much "stuff"?
Don't you think sometimes we over-think and complicate what should be the most beautiful and bountiful moments in our lives?

How about next weekend, you announce a picnic, just in your own backyard.
Limit yourself to a few food ingredients. Take one interesting book to share; it could even be a photo album.
A couple of jugs of ice cold water - there is nothing like pure cold water on a lazy hot afternoon.
I wonder what you'll all get to talking about.
Stop the world and step off for an afternoon and find the special in the simple.

Friday, February 25, 2011

Waffle Crochet Tutorial - From Blankets to Dishcloths


You may remember in the Wash Your Washcloths post a dish cloth featured and I said I would show you the stitch....
Here 'tis.
It's my all time go to for blankets. I know the granny is an old time favourite and looks really retro at the moment and it is OK for a climate like QLD, but this waffle type construction traps warm air and provides the cosiest rug of really robust construction.
Ideal for the Tasmanian conditions.
The best thing is there are very few rules and I find it uses up scrap wool effectively.
If you want to make a dish cloth, use pure cotton and those lovely scrubby ridges give just the grunt you need on some of the tough jobs. Maybe it takes a little longer to dry out but since you wash your cloths every day (Right?) that is not really a drama.


For rugs, use whatever you want to use up. (Do you see that variegated brown wool in the foreground there? I can remember buying that in Gladstone when I was in Gr 4/5 back in about 1975)
These are great for watching TV or emergency back up in the car.
Whether you make a single or a king size, it's up to you and how many chain stitches you do.


Even my edge was done with scrap. Leave plain or finish with a scallop edge.
So here is the step by step with LOTS of pictures because, I think I've told you before, I'm a visual person and it's easier for me to show rather than rely purely on words and instruction.

The crochet terms I use are Australian/English

(but I'm sure the Americans will figure out what they need to call the stitches)

Make a chain.....
and keep making it for as wide as you want the article to be.
For beds I always err on the side of caution and do a bit more than I think and I am never disappointed this way.
The first three stitches after you have turned are your first treble (tr)
So go ahead and make a tr in the 4th stitch there.
Now keep tr into every chain (ch) till you get to the end.

Like this.
Now turn around and go back the other way doing this...
Make 3ch (that counts as your first tr and will ever after on every row be the same)
So make a tr into the top of the very next tr.
Now here is where it gets special

Now make a tr but instead of going into the top of the next tr, go behind it.
Now do it again.
So far you have 3ch, 1 tr into the top of the 2nd tr and you have tr into the behind of the very next 2.
Continue along the row making a tr into the top of the next 2 tr and tr into the backs of the next 2.
2 in the tops, 2 in the backs
(Don't stress if you have an odd number once you get to the end, just keep to the pattern.)

Turn again and go back the other way, making your 3 ch
The very next stitch you will do is a tr into the back (see how that 2nd tr below is a sticky-outy type stitch? That tells you it's a tr behind)

The next 2 are into the top and the 2 after that are behind and so on and so forth till the end.

So you've got it now. It's making little pockets. It's all you'll ever do is those three chain stitches at the start of every row and then trebles either into the tops or behind. If you forget where you are up to, just look at the stitch you're about to go into,
Is it straight up or a bit stuck out.
Straight up...into the top.
Stuck out...into the behind.

Back and forth for as long as your heart desires or your bed length is gained.
Let me know if you have any trouble following this and I would love to see any projects made.

My sister-in-law has kindly pointed out that my blankets were done with one treble behind and two in the top rather than two and two. Either way is suitable. Should have got her to proof read - she is very talented and has a precise eye for detail. Thanks Leeann.

29/01/15
This pattern has kindly loaded on Ravelry and some project makers have made great notations about hook sizes and yarn and yardage so I am adding the url which many of you will find helpful. If you have also completed a project load it on the Ravelry page too!
http://www.ravelry.com/patterns/library/waffle-crochet-tutorial/people

Wednesday, February 23, 2011

A True Bushman's Hat

This is a true blue Australian Akubra "Cattleman" in fawn.
There is no better hat than an Akubra.
This is Craig's hat of choice.
He has two in fact.
I bought him one for his birthday nearly two years ago but it is still pretty much brand new
and he can't seem to quite relinquish his old comfy one....
Can you see the resemblance to the one at the top?
Yeah don't blame you, I'm not surprised.
It has been professionally mended in spots around the brim and then...
not so professionally mended in other spots.
It is a hat of many tales but mostly of hard work and lots of sweat.
A man has to truly love his hat to have had it for so many years without losing it.
What it does demonstrate most importantly is that quality lasts and when it breaks down or it tears...fix it. Too often we don't value the imperfect and are too quick to throw things away.
I really thought three years ago that hat was on it's last legs but here we are still wearing it and loving it to death. Even when it has fully disintegrated, how will we be able to throw the scraps away?
If you want a good lesson in "making do" and "getting on" then ask an Australian Bushman.

(forgive the funny look, we were having a spot of lunch in a paddock and I snapped an unflattering shot)

A bloke behind the bar at the local bottle shop offered Craig $50 for the hat...
naturally he didn't expect Craig to part with it but it's a story for the grandchildren.
So when you think something is broken, I hope you'll remember Craig's hat and maybe have a go and mend instead of throw.

Tuesday, February 22, 2011

Penny Farthing Championships

The annual National Penny Farthing Championships were on again last weekend.

They are held every February in Evandale, Tasmania.

I took these photos (rather poor ones using my phone) at Perth on Sunday while I was at the Growers' Market.

On the Sunday of the Championships they have a long race that takes the riders out of Evandale, via Breadalbane to Perth and back out to the other loop road back to Evandale.
A massive ride that is very uncomfortable, exhausting and a little dangerous but I get such a thrill when I see so many people still dedicated to this as a sport.
People come from all over the world to compete.
Balm for my nostalgic soul, makes another reason why I love living here in Tasmania.

Saturday, February 19, 2011

Bottling/Canning Tomatoes the Fowlers Way- Step by Step.


This step by step is especially for Funkbunny who has a blog about veggie gardening in suburbia.
They have great tips for growing and have recently blogged about drying veggies but was reluctant to bottle tomatoes. Tomatoes are super easy, super safe and super successful. Tomatoes are high acid fruits supremely suited for preserving this way. Funkbunny has a Fowlers kit and plenty of tomatoes so they are ready to roll.
The tomato situation here has been a bit lack lustre but here is my first bottling for the season.
I love having jars of chopped tomatoes in the cupboard because I use them for casseroles, winter slow cooking, pasta sauces and bases for curries.
I get myself comfortable with a chair pulled up to my marble table in the middle of the kitchen, a bit of music, a chopping board and a small bowl for scraps.
After washing and de-stalking, I sit and roughly chop the tomatoes, removing and cutting away any blemishes. I leave the skin as I don't mind it.
I also chop whatever tomatoes are available and they are a mix of large fleshy ones, roma styles and tiny tom styles. I like the random mix.
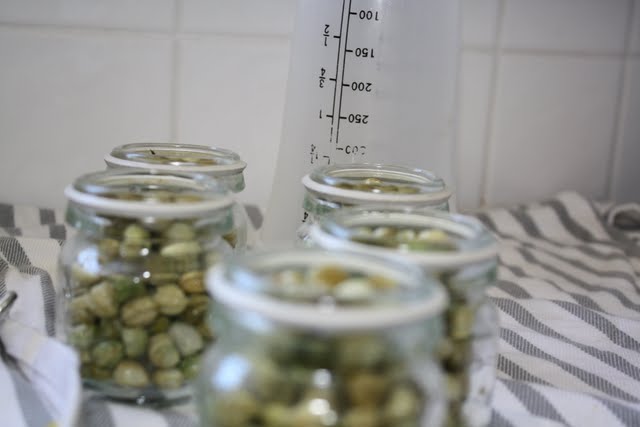
As I chop I put them straight into the clean jars packing them reasonably full and leaving about 1-2cm at the top.

Once the jars are full of tomatoes, the next step is to fit the rubber seals.
Pop them into a dish with some hot water for a couple of minutes to soften them to make them a bit easier to manage.
While they are in the warm water, wipe around the ridge and top with a clean damp cloth to ensure there are no stray tomato seeds. Though small, they will prevent a good seal. At the same time it's your last chance to check the jars for any chips or imperfections.
Now, take the seal and apply to the special groove in the bottle. I tend to grasp it with both hands between thumb and forefinger, fitting the edge closest to me first and stretching it forward and around the jar all the while holding the jar stable with my other fingers. It definitely gets easier with practice.
It's at this point you will realise why I haven't added the liquid yet because it would be a bit spilly.
IMPORTANT: Make sure the seal lies in the groove evenly and flat with no twists. You will note that it has a slightly sloping canter to it.


Now it is time to fill. I use plain good old award-winning Tasmanian tap water.
You can add salt if you want for ready to go seasoning in your cooking but I prefer to start blank.
I use my trusty Bessemer ware jug and fill slowly to limit air bubbles.


You wondering what the green is in the bottle? It's an heirloom green variety called Green Zebra and boy are they delicious.
Fill with water till they are about the level of the fruit. By maintaining 1-2cm of head space, it gives the lid space to vacuum seal, makes sense right.


Now use a skewer or chopstick or like me, plunge the knife in a couple of times releasing air bubbles and tap the jar on the wooden board a couple of times to see if anymore rise. There is nothing scary or mysterious about air bubbles, it just helps to stop the food rollicking with trapped air once it starts to get it's boil on thus displacing the lid or pushing food out of the jar...it's all about a good seal.


Now place the lids on fitting them flat and even to the seal. The Fowlers book suggests a slight screw lids turn to seat it. I spend the small bit extra for stainless steel lids because they are less reactive to food acids and last longer and rust less.
Remember stainless steel means it stains less, not stain proof, so always wash and dry thoroughly after use and store in dry conditions.
Now secure with the clamp.

Place the jars in the pot. If your outfit doesn't have a built in base, place a cake rack or some such in the bottom to stand the jars on. Fill with cold water about three quarters of the way up the jars.

Pop the lid on and put your thermometre in the little well at the side.
Bring to 92C (198F) slowly, this should take about 45 mins. I use med/high heat but you'll get to know your own stove through trial and error what temp works for you. Now hold at this temperature for another 45 mins. I have solid hotplates and generally 20mins into the maintain temp time I can turn the heat off and it still maintains for the rest of the time at the right temp. Again, you'll get to know your own stove. Trial and error, turning down heat, turning off heat...that is an experience thing.
IMPORTANT: My golden rule and I don't ever break it, do not be tempted to try to handle the hot bottles or pull them out straight away. Just let them sit and cool. There is bubbling hot, hot liquid in there. It is not worth risking severe burns.

So once they are cool enough to handle I put them aside on a board or a cake cooler. As I wipe each one over I press the flat of my thumb firmly onto the centre of the lid just to be sure we are getting a firm seal. 

LEAVE the clamps on for another 12-18 hours.
After this time take the clamps off. Give the lid a gentle tug to see if it's holding. Tip the jar next to your ear, listening very carefully for any air sucking sound. If all is quiet and firm then it's time to store in a cupboard.
Even though they look really pretty, they store better in the dark. It is also a good idea to periodically check them and make sure there are no active bubbles, fizzing or mould but I have never had a fail.

Friday, February 18, 2011

Resurekt

"Bringing the Past into the Present and giving it a Future"
That's the motto of my friends' new shop,
Resurekt.
You may have noticed a couple of weeks back I was a bit quiet on the posting.
I was working here doing a little painting, cleaning etc.
That's my bottom you see holding the ladder.
So the guys are taking things that would otherwise be on the scrap heap or at best on a very secondary market, and are turning them into individual designer pieces.
Both of them are artists and so talented. The stock has had a complete turnover in just two weeks so they are obviously filling a niche there.
(Top: is my favourite ottoman made from recycled? or is that up-cycled woollen rugs. So cosy for winter)
How clever is this awesome childrens' desk made from an old telephone table!

"beauty" from a series of redesigned dining chairs.

Like a floral rock star from behind.
This is the front view. Can you see the appliqued dragonfly and lady beetle? Divine.
Stock is updated (and sold) all the time.
They are the exclusive stockists of Suburban Jubilee cards of art and also stock hand made works by Hideyo

They are located at
207 Invermay Rd, Invermay, Tasmania 7250
Tues to Saturday.

Thursday, February 17, 2011

The Butterfly Net

The Universe loves me.
And here is an example....
It happens to me all the time.
This week I said to Craig,
"You know I hate using chemicals even the "good" ones, what I really need to control the cabbage moths is a butterfly net. Do you reckon I could make one?"
Well the next day,
the VERY next day,
I walk into an op shop and there it is.
A perfectly beautiful, vintage, hand knotted butterfly net.
It was $5.00...but I didn't have any cash because I had just bought lunch for my poor friend and you have to spend $10 if using eftpos.
I was not going to let this gift from the universe slip away.
"That's OK, just charge me $10"
it's a charity shop so I figure it's all for a good cause.
At that very moment the volunteer ladies of the shop realise that the lady before me has just stolen a royal commemorative plate.
So not only am I having a "good karma" day but I'm immediately clocking up more, I refilled what that thief took....
How convoluted is that though? Life is like the butterfly net; lots of threads all twisted and woven together.

Sometimes I wish for things but they are not always right for me.
A lot of the time though I find everything works just how it's supposed to.
I may not have a lot of money or a dead easy leisurely lifestyle but
I have enough
and I have what I need
and so long as every day contains one of those
"It doesn't get any better than this..." moments,
then I am blessed.
The dreaded cabbage moth sipping innocently from my Buddleia, unfortunately it is a life cycle I have to reduce. I figure they at least have a fighting chance with my netting skills. My theory is reduce the numbers, not wipe them out entirely, because everything has it's place in the system. If you use chemicals it's upsetting that balance.

Wednesday, February 16, 2011

Treasured - My Tea Towel is a Featured Item

My tea towel "Birds On A Wire" has been selected in an Etsy treasury by Earthrejoice!
So chuffed!
I have been madly working away on another largish order and have also added a new design to the cache
I call it

"Slippery When Wet"


Tuesday, February 15, 2011

MONA

M O N A


OMG!!!

Words fail though nearly every superlative is employed when anyone tries to describe this.....
Please click the link above to glimpse somehow THE most philanthropic gift of the past 100 years.
This is a private collection of vast proportions,
housed in THE most stunning architectural structure of magnificence,
AND it is offered to the people....
FREE!!!!

Ancient Egyptian antiquities displayed alongside boundary-pushing-controversial modern art pieces.
The whole tour is guided by i-phone pads that constantly update your geographical location to provide information about all the works of art.
It was emotional, breathtaking, wondrous
and though we spent hours there on Saturday, we only scratched the surface.
When we arrived home, we logged in to re-live the tour in 3-D on the computer....
AMAZING!!!!
We are so keen to go back again very soon.
Like many visitors this past month, you MUST come from far and wide to see this.

Monday, February 14, 2011

Love Shows In Little Things

I love flowers.
I love them in the house.
They are important to me and give me joy.
Craig quietly knows this about me.
He "gets" me....
he doesn't always agree or understand...
Often while at work in the bush he finds me things to bring home to the nest.
Best of all, when he finds flowers,
he thinks of me.
Even if he is tired and on the road home, if he sees an opportunity to make me smile, he'll stop.
He'll clamber through scrub or climb down ditches.
I don't need big store bouquets.
His sweet simple offerings are filled with all the love I need.

Tuesday, February 8, 2011

Processing the Pickled Nasturtium Pods


OK so the Nasturtium pods have been in a heavy brine solution for 48 hours.
The next step is to rinse them with plenty of cold water.
I have used the cutest, smallest Fowlers jars and placed the 2" rubber seals around the top. Make sure they are nice and fitted without any kinks. Soaking the seals in hot water for a couple of minutes makes them easier to manage.
Now fill the jars with the pods leaving a small amount of room for head space.


Fill with a mixture of 3 parts vinegar to 1 part water, again leaving a space of about half a centimetre from the top. If you don't allow a bit of room the lid cannot compress and create the vacuum seal.
I like to use stainless steel lids.
Place them on top and clamp in place with a 2" clamp.
So cute!...(did I already say that?)


Because these jars are so small the Fowlers pot is going to be complete overkill. They need to be processed in a water bath so you could use a stock pot for this size but be sure to use a cake rack or something to lift them directly off the bottom.
I am using my pasta pot as it is a regular stock pot size and has this great insert that will slip into the water and keep my jars suspended from the bottom.


Fill the pot with cold water till it is a little over three quarters up the side of the jar. Bring to 160F slowly and maintain there for 45 mins. I've lost my thermometer and only have the Fahrenheit one so...C?
Allow to cool slowly and leave the clamps in place for about 12 hours to ensure a good seal.
They are ready to use in about two weeks but will keep bottled this way for years.
Did I mention they look so cute!
Related Posts Plugin for WordPress, Blogger...